Winterizing a freehub is simply overhauling it with the right lubricant. This piece should help you decide whether you need to winterize your freehub and get you through the procedure if you decide to try. Manufacturers assemble freehubs with varying amounts of fairly thick grease in the bearings and pawls. At temperatures below about 20 F (-7 C), some freehubs start to have problems. The grease on the pawls becomes stiff enough to keep them from springing open to their engaged position.
The rider experiences this as pedaling with no resistance and no forward movement. Sometimes the pawls will slowly rise to a partially engaged position. They’ll catch and then slip. This is particularly undesirable, since the pawls and the steps they catch on are liable to chip, leaving steel fragments to do further damage inside the freehub.
Neither model nor year are useful predictors of which hubs will have cold-related trouble. The colder it gets the more likely a freehub is to malfunction. It’s usually best to wait and see if there are problems before winterizing a freehub. Unless the owner is doing the Iditabike or an Arctic expedition I take a wait-and-see approach. You’ll get some warning as the temperature slides downward.
Flushing with solvent has not been a reliable substitute for full disassembly. The pawl pockets trap partially dissolved grease right where it does the most harm.
 Freewheels and freehubs have similar internals and are subject to the same problems in the cold. This piece covers freehubs in detail since they’re more common on enthusiast-level bikes.
More specifically, it covers Shimano freehubs, which are standard on almost all bikes in the $400 to $1500 range. Taiwanese freehubs are similar enough internally that the same instructions apply, although the freehub body and the hub shell are attached in a variety of ways, none exactly like Shimano’s.
Many freehubs made by American companies use Shimano freehub bodies; the instructions also apply to them, with variations in how axle bearings are installed.
I’ve had good results winterizing non-Shimano style freehubs by degreasing and applying small amounts of Mag-1 on pawls. This includes Phil, Chris King, Hugi, White, and Sachs. These brands all have stronger pawl springs than Shimano.
Once winterized, the freehub is still ready for other seasons.
If your freehub doesn’t work at some other time of year and it’s past its warranty period (three years for XTR and Dura Ace, two for all other levels), then the procedure described here will allow you to diagnose and probably fix the problem.
If you use your winterized hubs year-round and put on a lot of miles in mud and rain, eventually enough contaminants will get in that you’ll need to winterize again. If there’s enough muck in the freehub, it will show winter symptoms at other times of year.
Shimano silent clutch freehubs will function at 60 below with no special treatment. Instead of pawls, they drive through about two dozen eighth-inch cylinders that roll into pockets and jam to drive, backing out a little to coast.
They’re called RO-80 and cost and look about the same as LX. They engage with less pedal motion at warm temperatures than pawl freehubs and take a little longer to engage at lower temperatures. While they always work at low temperatures, winterization brings them back to near-instant engagement no matter how cold it gets. They’re pretty much cold-proof since they depend on the viscosity of the grease to move the rollers into engagement. They’re about 120 grams heavier than LX.
A little about Lubriplate Mag-1
I’ve tested dozens of low-temperature lubricants and I’ve never found a generally available grease that’s as good for bike bearings in winter. It does fine at high temperatures and is the most water-resistant grease I’ve used.
It costs about $4 for a 14-ounce tube and can be found at auto supply stores and bearing and lubricant sources. It has a good reputation among heavy equipment mechanics here in Alaska.
Warnings
Freehubs are simple mechanisms, but if you’ve never seen the inside of a bicycle bearing before, I suggest you overhaul a front hub before disassembling a freehub. All of the non-cartridge bearings on bikes are of the same general design, they just go together differently. If you understand a front hub, you’ll understand headsets, pedals, freehubs, and pre-cartridge bottom brackets.
So, I’m assuming some familiarity with hub bearings. I won’t be explaining how to disassemble or adjust them.
Shimano’s position on taking apart freehubs is: DON’T! If it works, leave it alone. If it doesn’t, send it to them for warranty evaluation. They are generous in their handling of warrantee situations, but disassembly will put the part out of the warrantee for some problems.
The right side dust cap is almost impossible to remove without some distortion, so they will know. I’ve winterized hundreds of freehubs and freewheels and have taught dozens of people how to do the job. I went through the procedure while writing this, to be sure that nothing got left out.
But in the end, you’re on your own. If it screws up, neither Icebike.org nor I can take responsibility.
Tools and supplies
- Hyperglide lock ring tool
- Large wrench or vise, to turn the HG lock ring tool
- One chain whip
- 15 mm cone wrench, to fit the left cone
- 17 mm open end or adjustable wrench for all left lock nuts except current XTR, which needs a 17 mm cone wrench
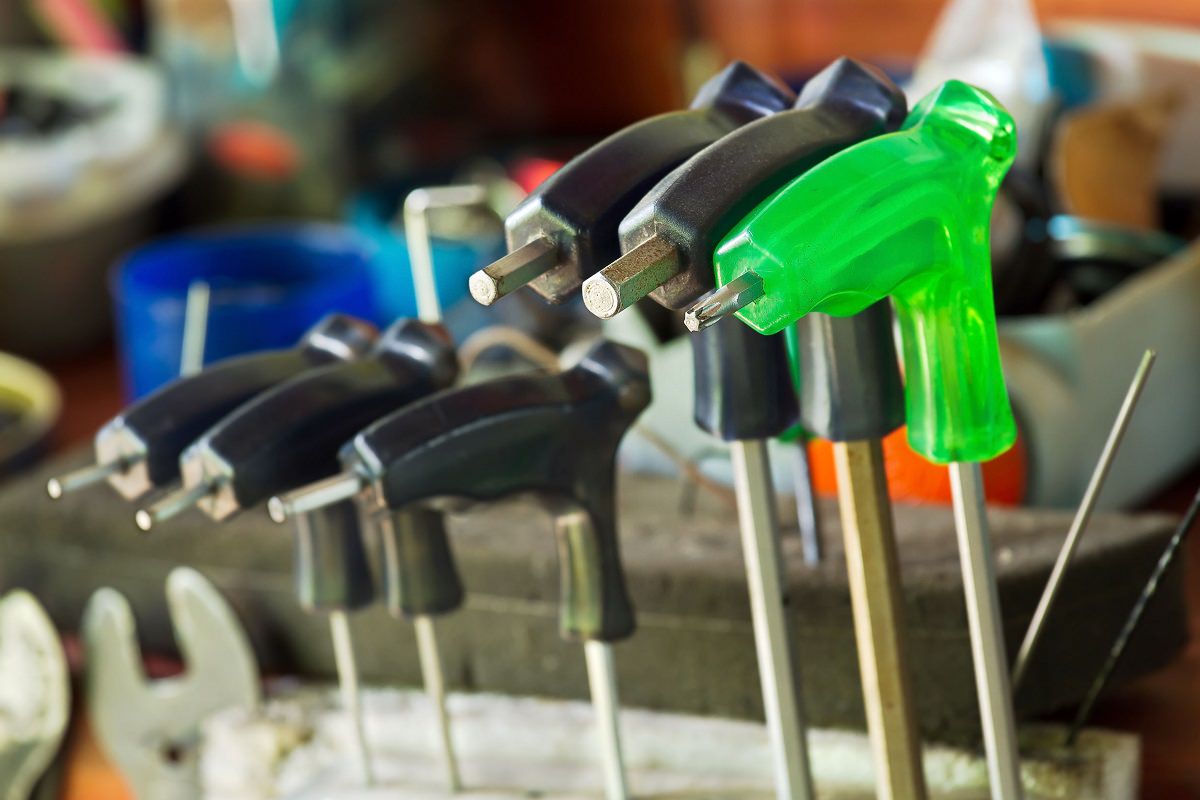
- 10 mm Allen wrench (some Taiwanese freehubs use a 12 mm)
- Large screwdriver for prying out the right dust cap
- Shimano freehub body disassembly tool; Shimano calls it an FH-40. You can make a usable substitute by grinding an old Suntour 2- or 4- 4-prong freewheel tool (Park FR-2 or FR-3)
- Lubriplate Mag-1
- Rags or paper towels
- Access to a replacement right dust cap in case you ruin the original
- A small magnet is helpful in handling bearings.
How To Winterize Your Freehubs
Remove the cassette: Thread off quick release nut, seat cassette lock ring tool into splines in the lockring, and thread quick release nut on the finger tight to secure the tool. Turn the cassette lockring tool counterclockwise while using the chain whip to keep the cassette itself from turning.
Once the lock ring tool turns easily, remove the QR nut and thread the cassette lockring out completely. The cassette should slide off the freehub body. Remove left side lockout, washers, and cone. Keep track of the order and facing of parts as they come off the axle.
Remove axle. Remove ball bearings. Count’em, Nine quarter inches per side. Carefully pry out the right side dust cap. Try gently prying on one spot and then another, working your way around the dust cap. I can remove about four out of five without damage.
The ’99 LX, XT, and XTR fit tighter than earlier models and are harder to remove without damage. If you bend it beyond repair, Morningstar makes replacements that are better than the stock ones for about $4.
Use the freehub disassembly tool to loosen the bearing cup that you can see when the dust cap comes out. The cup is reverse threaded, so turn it clockwise. At this point just loosen it slightly, do not remove. Note the tightness. It’s not very tight. Be prepared to put it back into slightly more than the same torque.
Use the 10-mm Allen wrench to loosen the hollow bolt that holds the freehub body to the hub shell. It’s on quite tight and has normal threads (loosen counterclockwise). Back the Allen bolt out all the way and the freehub body should separate from the hub shell. Pull the Allen bolt out and set it aside.
On some models, there’s a flat washer on the hub shell under the freehub body. If it’s there, take it off and set it aside so it doesn’t get lost. Place a paper towel or clean rag on a bench or tabletop. Place the freehub body, spline-side down, on the rag or paper towel. Fully unscrew the cup that you previously loosened (comes off clockwise).
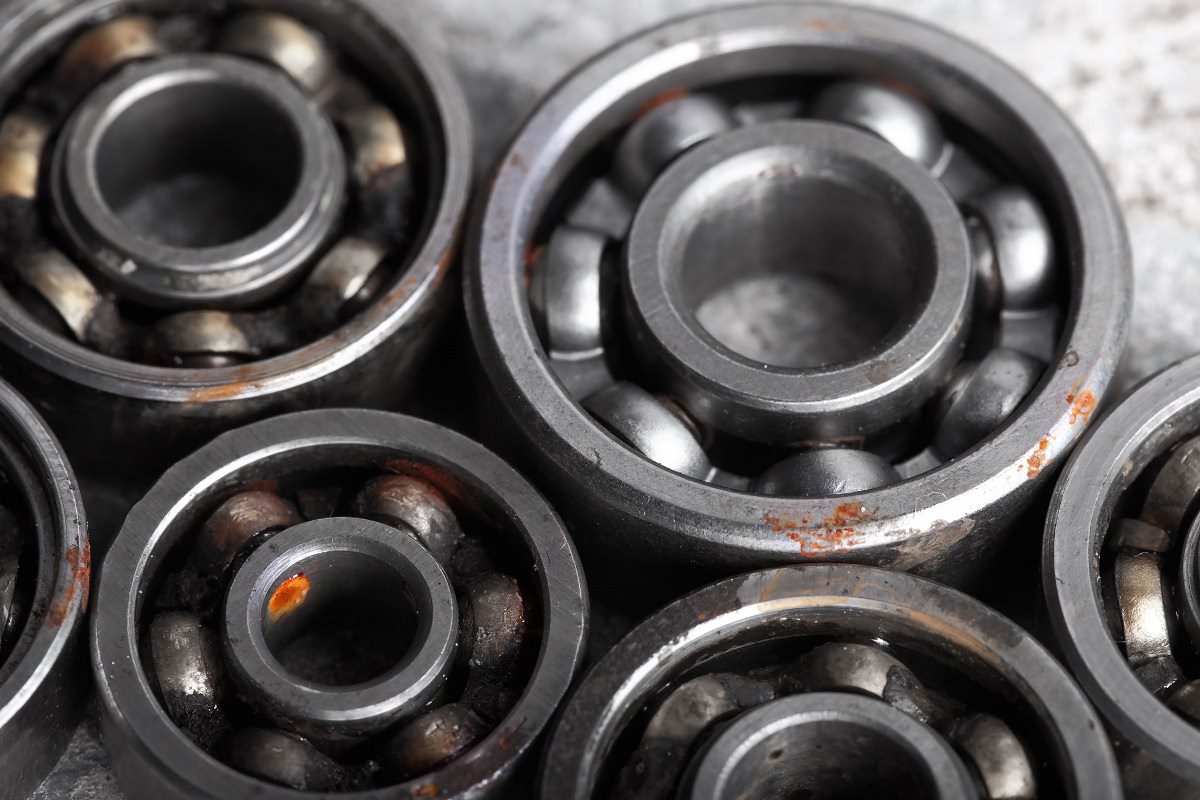
 Lift the outer (splined) part of the freehub off the inner part. Ball bearings will fall out. Catch them (magnet), put them in a degreaser, and set them aside. There should be 25 bearings at each end (eighth inch).
Keep track of the washers on the inner freehub body. There are usually three. The thickest one goes on first. Some models have a rubber seal ring on the inner body on the hub side, (shown at the left of the image at right). If yours does, note its orientation before removing it.
Note how the pawls sit in their pockets. Push them in and feel how weak the spring is that moves them up to engage and drive. It doesn’t take much resistance, from dirt or cold-thickened grease, to keep them from working.
Look at the pawls and consider that when you’re stomping on the pedals, pulling up on the bars, all of that force is transmitted by those two little slivers of steel. There are three sets of pawls in some freehubs, but only two sets in Shimano freehubs.
 Pop the pawls out from under their spring without distorting the spring. Note pawls balanced on their pocket out from under the retaining spring. The spring fits in that little groove.
This whole assembly is less than an inch in length, yet it transmits all the torque. Thoroughly degrease all parts, especially the pawls and the cog-shaped parts on the inside of the splined outer body that they engage.
Reinstall the pawls.
 Put a thin bead of Mag-1 on the bearing tracks on the inner part of the freehub (the depression is just at the tip of the screwdriver in the above photo).
Make sure no grease gets on the pawls or the pockets in which they sit. Stick 25 balls to the track. You want just enough grease to hold them in place. Slide the outer freehub body over the inner one without disturbing the balls.
Put the three washers back on the end of the inner freehub body, the thickest one at the bottom.
Drop the other 25 balls into the upper-bearing track.
Put a bead of Mag-1 on the bearing surface of the threaded race and thread it onto the freehub inner body.
 If there was a washer on the hub shell under the freehub body, put it back on. Reinstall the freehub body onto the hub shell, getting the 10 mm Allen bolt very tight. (400-inch pounds or bouncing with a straight arm on a six-inch wrench)
Tighten the bearing cup to the torque you remember from removing it a little bit more. If you’ve done it all correctly, the freehub should click while turning freely counterclockwise and should catch when turned clockwise.
If you’ve killed the right dust cap, order a new one. If not, press it back into place so about an eighth inch of threads show outside it.
Reassemble the axle into the hub, using Mag-1 and 9 balls per side.
The axle should turn freely in the freehub body dust cap. If it doesn’t, check for slight distortions of the dust cap. Try pressing the dust cap in a little further, so it clears the outer part of the cone.
It’s also possible to do this job on a hub before building it into a wheel. The bolt that holds the freehub body to the hub shell is very tight and can’t be loosened without holding the hub shell firmly. You can, however, disassemble the freehub body without removing it from the hub and follow the whole procedure as indicated above.
Should you grease your freehub body?
Yes, greasing your freehub body will make sure that there is no corrosion.
For these photos, I’ve used an old freehub with corroded bearing races. Your should generally appear bright and shiny inside. This is how I winterize my freehubs. What method do you follow? Are you going to try out my method? Let me know in the comments!
Also Read:
- Should You Grease Bicycle Pedals? Let’s Find Out!
- Bike Seat Keeps Tilting: 9 Common Causes And Easy Solutions


3 thoughts on “Winterizing Your Freehubs for Winter and Ice Biking”
Thank you for your website post. Thomas and I happen to be saving for our new publication on this subject and your article has made us all to
save our own money. Your notions really resolved all our inquiries.
In fact, a lot more than what we had recognized ahead of the time we discovered your wonderful blog.
My partner and i no longer nurture doubts as well as a troubled mind because you have completely attended to the needs above.
Thanks
have you had any experience with mag-1 on industry nine hubs? for extreme cold weather expeditions like the Iditarod, would you recommend repacking all your bearings (hubs, bb, headset, etc) with mag-1, or just the freehub pawls? thanks!!
Thanks a lot John!
Perfect instructions, (and the most important part for me was that the cup is left threaded;-)